This article is dedicated to Alex, that asks me how to create a basic CRUD from a database without development, this is called Scaffolding.
For me, Scaffolding is one of the most amazing techniques that people don’t want to use. Exist a major reason, that reason is every time someone accesses the URL and execute the code, a huge process begins asking for the database and constructing the CRUD from zero.
Exist a lot of frameworks with Scaffolding in PHP, but I prefer CakePHP by its simplicity. Other languages like Python with Django and Flask or Ruby On Rails have their own mini scaffolding.
A little Terminology
Actually, the last version of CakePHP doesn’t support Scaffolding, they remove it in the 2.5 version (actually the last version of CakePHP is 3.3).
Before to begin I want to explain some of the vocabularies here:
- CRUD: means CReate Update Delete. Actually when developers talk about CRUD refer to the pages needed to list records from a database, form to create new records and form to update records.
- Scaffolding: Technique that creates CRUD list and forms on the fly and shows it.
Ok, continue explaining the difference between the two main techniques regarding this. The best of both is CRUD generation. CRUD Generation executes one code that explores the database and generates the PHP files needed to access a database. Scaffolding does something similar, explores database and create CRUD on the fly. This is the reason that needs a lot of resources.
If you have a consistent database and don’t need to change anything I recommend that you use some of the CRUD generators. Two of the best for me:
We need Data
Now I want to begin our amazing scaffolding project. First of all, I need to create a database. I will begin to create 2 tables. One of the articles and others from categories of articles. Something simple.
I followed the model convention name of CakePHP:
https://book.cakephp.org/2.0/en/getting-started/cakephp-conventions.html#model-and-database-conventions
I don’t want to enter to explain databases, I suppose that you can figure out how to create your own database and tables and connect to a server. Anyway, here the structure:
1 2 3 4 5 6 7 8 9 10 11 12 13 14 15 16 17 18 19 20 21 22 23 24 25 26 27 28 29 30 31 32 33 34 35 36 37 38 |
CREATE TABLE `Categories` ( `id` int(11) unsigned NOT NULL AUTO_INCREMENT, `name` varchar(100) DEFAULT NULL, `active` tinyint(1) DEFAULT NULL, PRIMARY KEY (`id`) ) ENGINE=InnoDB DEFAULT CHARSET=utf8mb4; INSERT INTO `Categories` (`id`, `name`, `active`) VALUES (1,'Category 1',1), (2,'Category 2',1), (3,'Category 3',0), (4,'Category 4',1); CREATE TABLE `Articles` ( `id` int(11) unsigned NOT NULL AUTO_INCREMENT, `name` varchar(100) NOT NULL DEFAULT '', `price` decimal(9,2) NOT NULL, `active` tinyint(1) NOT NULL, `stock` int(11) NOT NULL, `category_id` int(11) unsigned NOT NULL, PRIMARY KEY (`id`), KEY `category_id` (`category_id`), CONSTRAINT `Articles_ibfk_1` FOREIGN KEY (`category_id`) REFERENCES `Categories` (`id`) ) ENGINE=InnoDB DEFAULT CHARSET=utf8mb4; INSERT INTO `Articles` (`id`, `name`, `price`, `active`, `stock`, `category_id`) VALUES (1,'Art 1',10.00,1,5,1), (2,'Art 2',10.00,1,5,1), (3,'Art 3',10.00,1,5,2), (4,'Art 4',10.00,1,0,2), (5,'Art 5',10.00,1,5,3), (6,'Art 6',10.00,0,5,4), (7,'Art 7',10.00,1,5,4), (8,'Art 8',10.00,1,5,4), (9,'Art 9',10.00,1,5,4); |
Install Cake
It’s time to install CakePHP. You can choose to download or use git. I prefer git but maybe you want to download:
Git
I create a directory and enter it and clone:
1 2 3 4 5 6 7 8 9 10 11 12 13 14 15 16 17 18 19 20 |
$ mkdir scaffolding $ cd scaffolding $ git clone -b '2.4.9' --single-branch https://github.com/cakephp/cakephp.git . Clonar en <<.>>... remote: Counting objects: 180322, done. remote: Compressing objects: 100% (102/102), done. remote: Total 180322 (delta 17), reused 99 (delta 14), pack-reused 180206 Receiving objects: 100% (180322/180322), 28.16 MiB | 3.22 MiB/s, done. Resolving deltas: 100% (136504/136504), done. Checking connectivity... hecho. Note: checking out '4b5e3c176ece9ddab5ac438cfba0bdcdd0d3ab9e'. You are in 'detached HEAD' state. You can look around, make experimental changes and commit them, and you can discard any commits you make in this state without impacting any branches by performing another checkout. If you want to create a new branch to retain commits you create, you may do so (now or later) by using -b with the checkout command again. Example: git checkout -b <new-branch-name> |
With -b ‘2.4.9’ in clone, we are telling that only want this branch or tag. If you look VERSION.txt of CakePHP you can see version:
1 2 3 4 5 6 7 8 9 10 11 12 13 14 15 16 17 18 19 20 21 |
# cat lib/Cake/VERSION.txt //////////////////////////////////////////////////////////////////////////////////////////////////// // +--------------------------------------------------------------------------------------------+ // // CakePHP Version // // Holds a static string representing the current version of CakePHP // // CakePHP(tm) : Rapid Development Framework (https://cakephp.org) // Copyright (c) Cake Software Foundation, Inc. (https://cakefoundation.org) // // Licensed under The MIT License // Redistributions of files must retain the above copyright notice. // // @copyright Copyright (c) Cake Software Foundation, Inc. (https://cakefoundation.org) // @link https://cakephp.org // @package Cake // @since CakePHP(tm) v 0.2.9 // @license https://www.opensource.org/licenses/mit-license.php MIT License // +--------------------------------------------------------------------------------------------+ // //////////////////////////////////////////////////////////////////////////////////////////////////// 2.4.9 |
Download
You also can download it directly from GitHub. Follow the next link and click the green button called Clone Or Download and then click Download ZIP. Decompress the file in a directory and continue.
Github Cake PHP
Try It
If you are using Apache in your environment, all works fine and you halt next step.
NGINX
In another hand, if you work with nginx you need to configure your server to make a good environment for CakePHP. Follow instructions in CakePHP Cookbook:
Book Cake PHP Installation
Trying
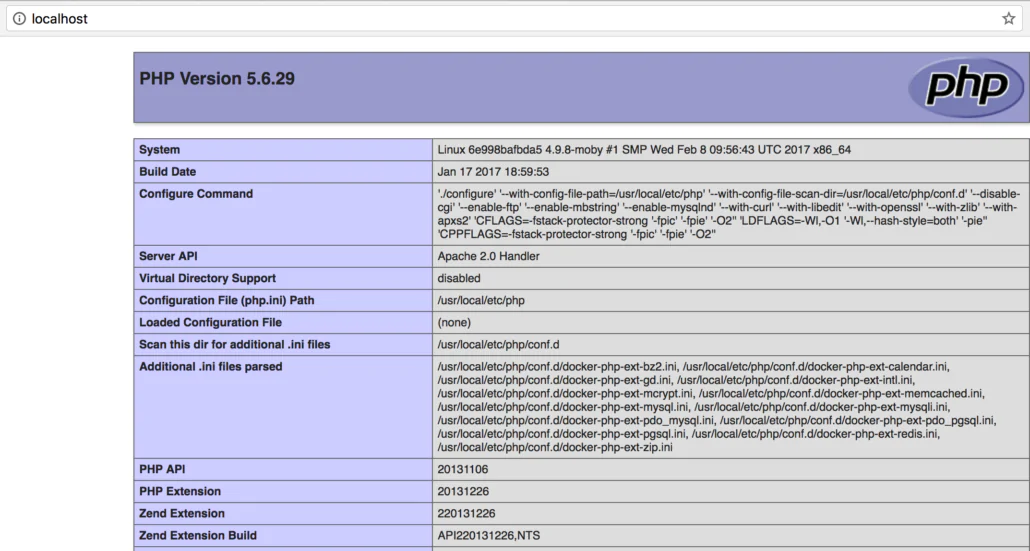
Then, if you load now your CakePHP URL you will see your first big-screen :)
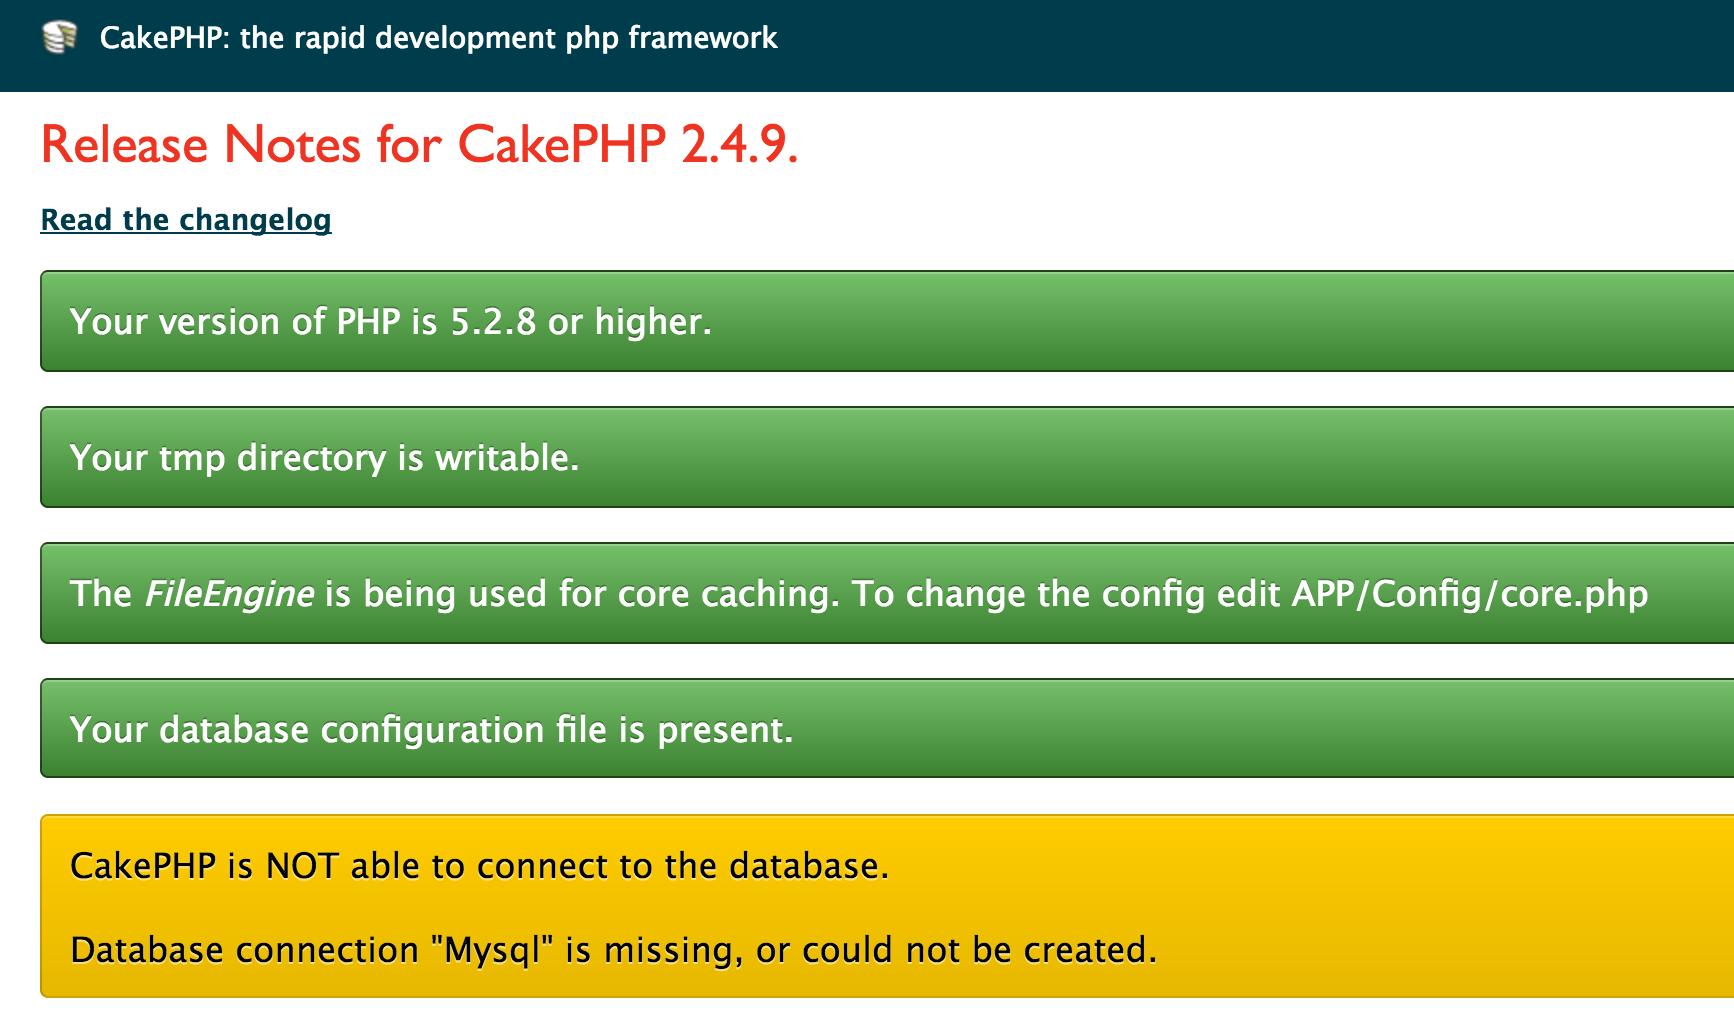
This is correct, CakePHP is telling us that all is correct but a database isn’t we need to write database config.
Configure Cake
First, we need to connect to a database. This means that we need to create a configuration file. We have one sample file in:
|
|
app/Config/database.php.Default |
Rename it to
And open it, search for the next code and fill it with your data (is important that uncomment utf-8 if you use accents):
|
|
public $default = array( 'datasource' => 'Database/Mysql', 'persistent' => false, 'host' => 'localhost', 'login' => 'user', 'password' => 'password', 'database' => 'database_name', 'prefix' => '', //'encoding' => 'utf8', ); |
A configured database, the next step, begins the big and complex scaffolding code.
Creating Models
Now it’s time to create the models’ files to tell CakePHP what tables are involved. Create a file:
And write (or paste) the next code:
|
|
<?php App::uses('AppModel', 'Model'); class Category extends AppModel { public $name = 'Category'; } |
Save it and do the same with Articles:
And code:
|
|
<?php App::uses('AppModel', 'Model'); class Article extends AppModel { public $name = 'Article'; } |
It’s done, we have models.
Creating Controllers
It’s time to create Controllers. Controllers are files that control the execution of an application and ask models for data and send to views. In CakePHP also are mapped to URLs. If you want to access to domain.tld/products you need to create a ProductsController. In our case, I want two URLs, one for Articles and the other for Categories. Create file:
|
|
app/Controller/ArticleController.php |
And now the most complex and difficult to read code:
|
|
<?php class ArticlesController extends AppController { public $scaffold; } |
The property $scaffold is the most important, tell CakePHP that this controller is a Scaffolding controller.
Now for categories:
|
|
app/Controller/CategoriesController.php |
and code:
|
|
<?php class CategoriesController extends AppController { public $scaffold; } |
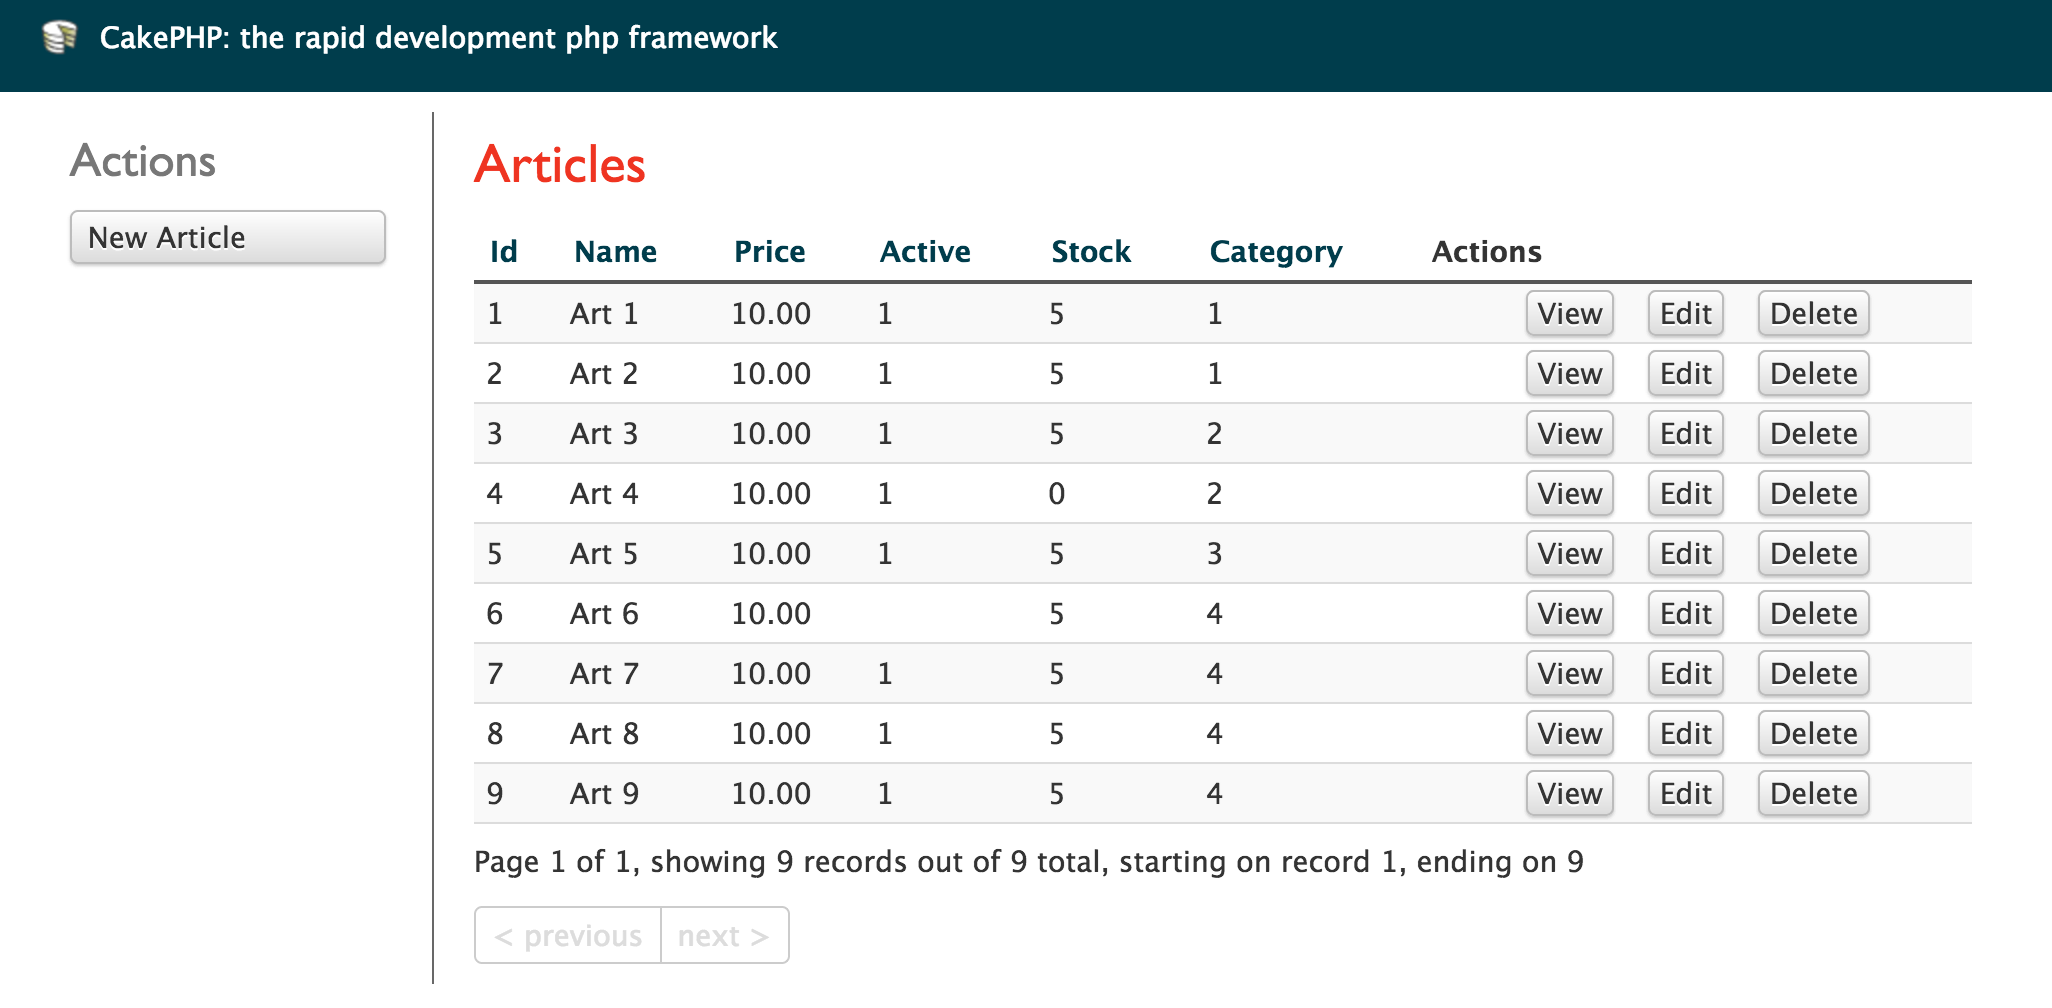
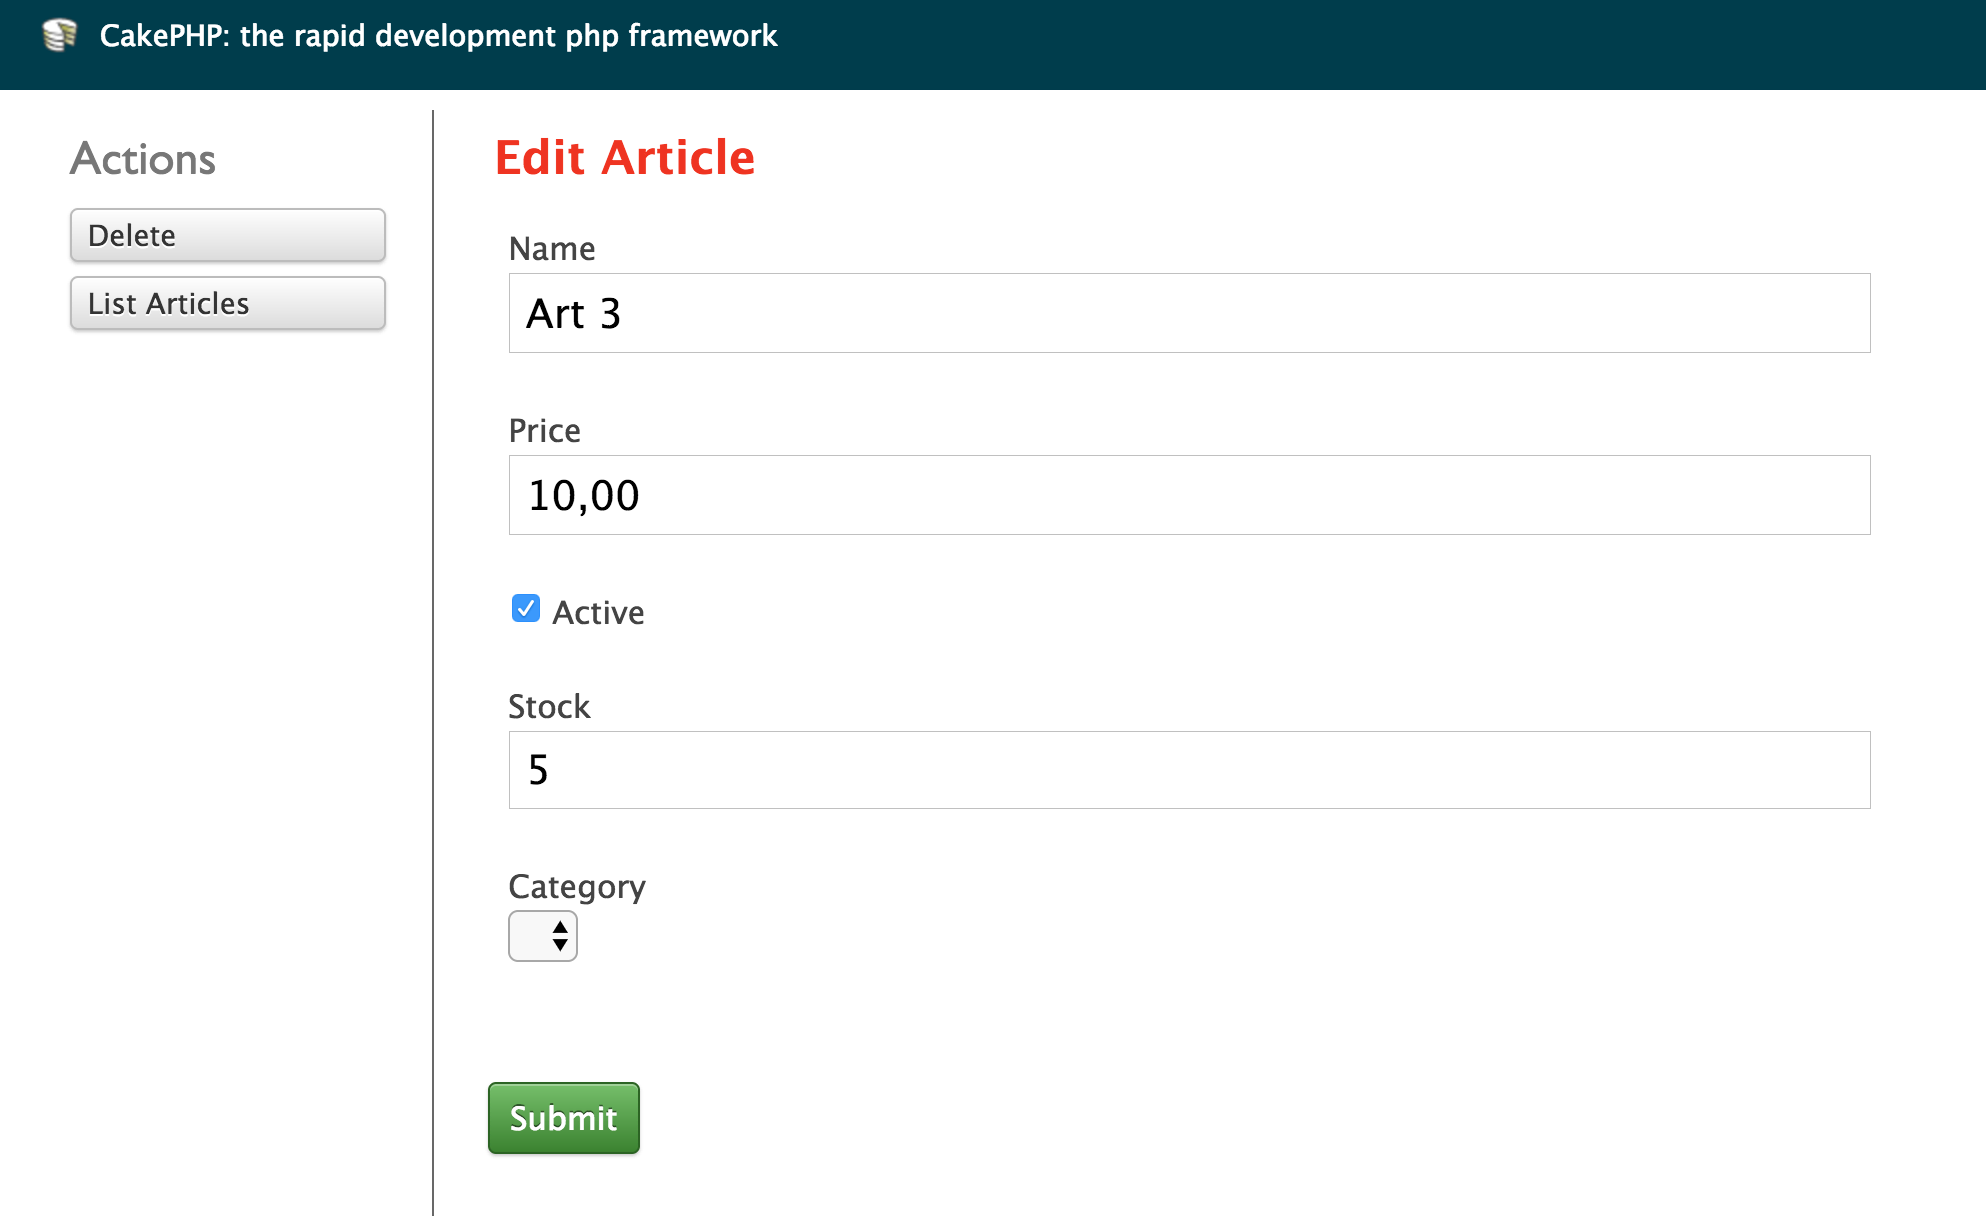
It’s done. Scaffolding it’s working. You need to access the domain.tld/articles and CakePHP does the work for you, scaffolding in action.
Scaffolding
Scaffolding List:
Scaffolding Edit:
You can browse for categories in the domain.tld/categories
Improvements
If you browse a little bit, you notice that category isn’t shown in Articles Scaffolding, only show ids. This is because the models need to know the relations between tables. Only change models to:
|
|
<?php App::uses('AppModel', 'Model'); class Article extends AppModel { public $name = 'Article'; public $belongsTo = 'Category'; } |
|
|
<?php App::uses('AppModel', 'Model'); class Category extends AppModel { public $name = 'Category'; public $hasMany = 'Article'; } |
With $belongsTo and $hasMany properties, we tell to Cake the relation with tables. Remember that if you don’t follow conventions this relation won’t work. In Articles is important the existence of category_id, with another name the relation will be more complex. You can see relations here:
Book CakePHP Models
Finally, I show you how can use Scaffolding with CakePHP. But remember that this is hard work for servers if you use a lot of tables and users, and is better to use CRUD instead.